
The short answer
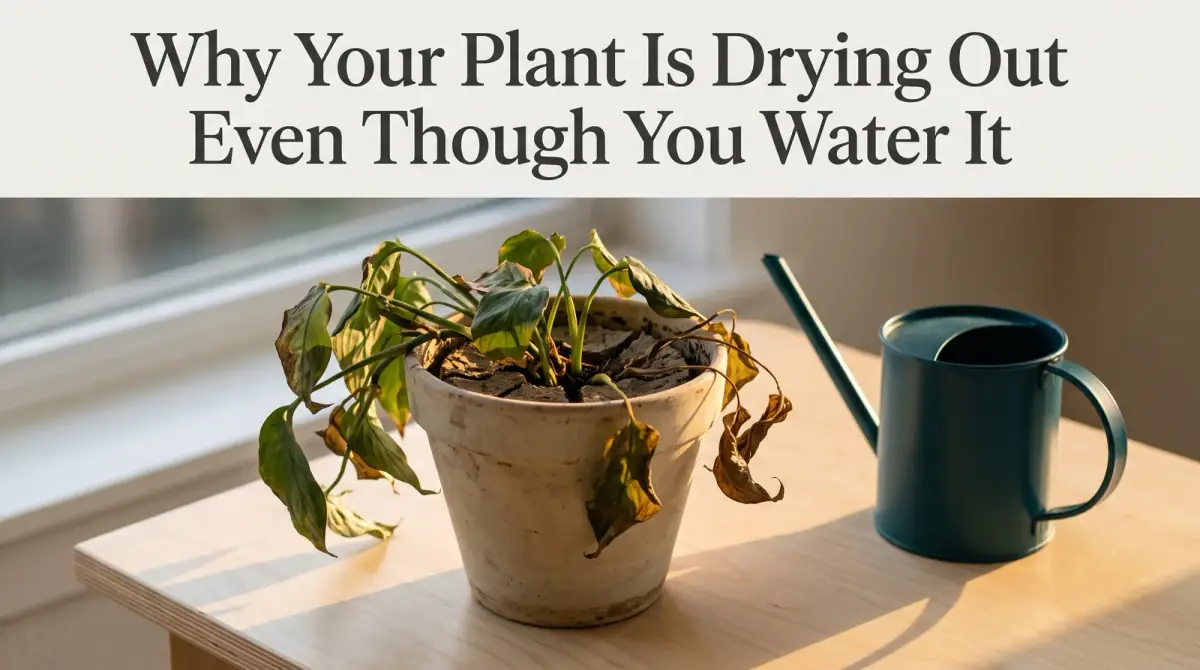
Watering faithfully but your plant still looks crispy? The water may be running straight through. Here is why your plant is drying out and how to fix thirsty soil.
- Bone-dry soil can repel water, so it runs through without wetting the roots.
- Fast drainage after watering is the classic sign of this problem.
- Low humidity and root-bound pots also cause crispy, drying leaves.
- A slow soak or bottom watering rehydrates stubborn, dried-out soil.
- Consistent watering prevents the soil from drying out that far again.
If your plant is drying out even though you water it, the water is almost certainly running past the roots instead of soaking into them. That happens for three main reasons: the soil has gone hydrophobic and now repels water, the plant is rootbound so there is hardly any soil left to hold moisture, or the mix drains so fast that nothing stays behind for the roots to drink.
The saucer fills, you tick the job off your list, and meanwhile the middle of the root ball is still bone dry. Once you work out where the water is actually going, this is one of the easiest plant problems to fix.
Key takeaways
- Bone-dry soil can repel water, so it runs through without wetting the roots.
- Fast drainage after watering is the classic sign of this problem.
- Low humidity and root-bound pots also cause crispy, drying leaves.
- A slow soak or bottom watering rehydrates stubborn, dried-out soil.
- Consistent watering prevents the soil from drying out that far again.
Why is my plant drying out even though I water it
Watering and hydrating are not the same thing. Water only counts if it soaks into the soil around the roots and stays there long enough to be absorbed. If it slides down the inside of the pot and out the bottom, you have watered the sink, not the plant.
Work through the usual culprits in this order, because the first is by far the most common.
- Hydrophobic soil that has dried out so far it now repels water instead of absorbing it.
- Water channelling down the gap between soil and pot instead of soaking the middle.
- A rootbound plant with so many roots there is barely any soil left to hold moisture.
- Drainage that is too fast, usually from a mix heavy on perlite, bark or grit.
- Low humidity or high heat pulling moisture from the leaves faster than the roots replace it.
More than one is often at play, and a rootbound plant in dried-out compost beside a radiator is a common combination.
The hidden problem of hydrophobic soil
Hydrophobic simply means water-repellent. Peat-based and coir-based composts hold water beautifully until they dry out completely, at which point the fibres shrink and their surfaces turn waxy, so water beads on top instead of being drawn in.
The shrinking causes a second problem. As the compost contracts it pulls away from the sides of the pot, opening a narrow gap all the way around. Water takes that path of least resistance and pours straight out of the drainage holes, bypassing the root ball.
The signs are easy to recognise once you know them:
- Water pools on the surface for a moment, then vanishes all at once.
- You can see water running down the inside edge of the pot.
- Drainage is almost instant, within a second or two of pouring.
- The pot still feels light when you lift it after watering.
- The surface looks damp but the soil an inch down is dusty.
How to rehydrate hydrophobic soil properly
Rescuing water-repellent soil is simple, it just takes time. The goal is to hold water against the compost long enough for the fibres to swell and start absorbing again, which pouring from a can cannot do.
- Break the surface first. Loosen the top inch with a fork or chopstick so water can enter rather than run off, then press the soil back towards the pot wall to close the gap at the rim.
- Fill a sink, basin or bucket with room-temperature water, deep enough to reach a third of the way up the pot.
- Stand the pot in it so water seeps up through the drainage holes. Bottom watering works because capillary action pulls moisture slowly through the whole root ball.
- Leave it to soak for twenty to thirty minutes. Very dry pots may need an hour, and pots that float need weighting down.
- Check the surface. Once the top of the soil has turned dark and damp, the water has travelled all the way through.
- Lift the pot out and let it drain fully before it goes back on its saucer. Never leave it standing in leftover water.
For stubborn cases, a single drop of mild dish soap in the soaking water breaks the surface tension and helps the compost wet through. Use it as a one-off rescue, not a routine.
Once the soil is damp, top the pot up with fresh mix to close that gap at the rim, so water cannot escape down the sides next time.
Rootbound plants: more root than soil
A plant that has outgrown its container has crowded out its own water supply. Roots hold very little moisture compared with compost, so a pot packed solid with them dries out within a day or two no matter how thoroughly you water.
Checking takes two minutes. Look for roots poking through the drainage holes or circling on the surface, then slide the plant out of its pot, supporting the base of the stems with one hand.
A dense white or tan web of roots wrapped around the outside with almost no soil visible means the plant is rootbound. If compost falls away and you can see plenty of soil, it is not.
The fix is repotting, not more frequent watering. Move the plant into a container one size larger, tease the outer roots apart so they grow outwards instead of circling, and work fresh mix around the sides. Spring and summer are best, while the plant is growing and can settle in quickly.
When the drainage is simply too fast
Sometimes the soil is not repelling water at all, it just cannot hold on to it. A mix heavy on perlite, bark, grit or sand drains freely by design, which suits cacti and orchids but leaves thirsty tropical plants permanently short.
Old compost causes the same problem from the other direction. Over months and years the organic matter breaks down and the structure collapses, leaving something compacted or crumbly that no longer retains moisture.
Watch for these signs of a drainage problem rather than a hydrophobic one:
- Water soaks in readily but the pot is dry again within a day.
- There is a visible gap between soil and pot even when the compost is damp.
- The mix looks pale and gritty, or full of white perlite chunks.
- The plant sits in unglazed terracotta, which wicks moisture out through its walls.
Repotting into a better mix is the real answer. A general purpose houseplant compost with added coir holds moisture far longer than a cheap, dusty soil that dries hard.
Plant overwatered vs underwatered: how to tell them apart
This is where most people go wrong, because both produce a wilting plant with browning leaves. Reaching for the watering can when the real problem is drowned roots will finish the plant off, so it is worth checking properly.
The most useful test is to feel the soil two inches down rather than judging by the surface. Dry and dusty means underwatered. Damp, cold and heavy means the opposite, and the wilting is coming from roots that have begun to rot and can no longer take water up.
Signs of an underwatered plant
- Leaves are dry, crisp and papery, and crumble when you rub them.
- Browning starts at the tips and edges and works inwards.
- The whole plant droops but perks up within hours of a thorough soak.
- The pot feels light, and the soil has pulled away from the sides.
- Lower leaves drop while still dry.
Signs of an overwatered plant
- Leaves are soft, limp and yellowing rather than crisp.
- Brown patches are dark, mushy or ringed with yellow.
- The soil stays wet for days and may smell sour or musty.
- The stem base feels soft, and roots look brown and slimy rather than firm and pale.
- Fungus gnats hover around the pot.
The confusing part is that a badly overwatered plant eventually shows crispy leaves too, because damaged roots cannot deliver water even when the pot is soaked. If the soil is wet and the leaves are crisp, treat it as root rot: stop watering, move the plant somewhere brighter and warmer, and check the roots.
Heat, dry air, sun and drafts
Even a well watered plant loses through its leaves what the roots supply. When the air is hot and dry that balance tips, and the leaf edges crisp regardless of what you do at soil level.
Radiators and heating vents are the worst offenders in winter, creating a pocket of very dry air that pulls moisture out of foliage all day. Air conditioning does the same in summer, and drafty doorways add cold, moving air on top. Direct sun through glass heats the pot itself and dries the compost from the outside in.
The fixes are simple. Move plants away from heat sources, pull them back a foot or two from the glass, group them so they share the moisture they release, or stand pots on a tray of damp pebbles. Brown, papery tips on an otherwise healthy plant usually point here rather than to the watering can.
Why little-and-often watering backfires
A splash every couple of days feels attentive, but it is the most common watering mistake there is. A small amount of water wets only the top inch of compost and then evaporates, so the deeper roots that supply most of the plant never get anything.
Worse, roots grow towards moisture. Keep the water shallow and the plant builds a shallow root system, which dries out faster still and makes the problem self-reinforcing.
Water thoroughly and less often instead. Pour slowly until water runs from the drainage holes, wait a few minutes, then add a little more so the whole root ball is wet. Then leave the plant alone until the top inch or two has genuinely dried out.
How to check whether water is actually reaching the roots
Three quick checks confirm the diagnosis before you change anything.
First, time the drainage. Water as usual and watch the bottom of the pot. Water appearing almost immediately means it found a channel and skipped the root ball, while a minute or more means the compost is absorbing properly.
Second, do the finger test an hour after watering. Push a finger two inches into the compost, or slide in a wooden skewer and pull it out. Dry soil at that depth proves the moisture never reached the middle.
Third, lift the pot before and after. One that has taken up water feels distinctly heavier. Together these checks separate a soil problem from an air problem, which saves you treating the wrong thing.
Recovery timeline and what to expect
Once the roots are properly wet again, an underwatered plant responds faster than most people expect. Within a few hours to a day, drooping stems and soft leaves usually lift and firm up, which is the clearest confirmation that thirst was the problem.
Over the following week the plant stabilises and stops shedding leaves. Anything already brown and crisp will not turn green again, as that tissue is dead. Trim the worst off for appearance, or remove a whole leaf at the base if most of it has gone.
Within two to four weeks in the growing season, healthy new growth should appear, and that is the real sign of recovery. No new growth after a month, with soil staying wet, points to damaged roots rather than thirst.
When to worry, and when not to
A few crispy older leaves are normal, since plants shed lower foliage as they grow. What matters is the overall trend rather than any single leaf.
Worry when the crisping spreads to new growth, when the plant wilts even though the soil is damp, or when the stem base feels soft. Those point to root damage rather than simple thirst.
So the next time you find yourself asking why your plant is drying out even though you water it, start with the soil and the watering technique rather than reaching for more water. Get the moisture back to the roots, keep it there with steady habits, and those crispy leaves will give way to fresh growth.
Comments
0 total